
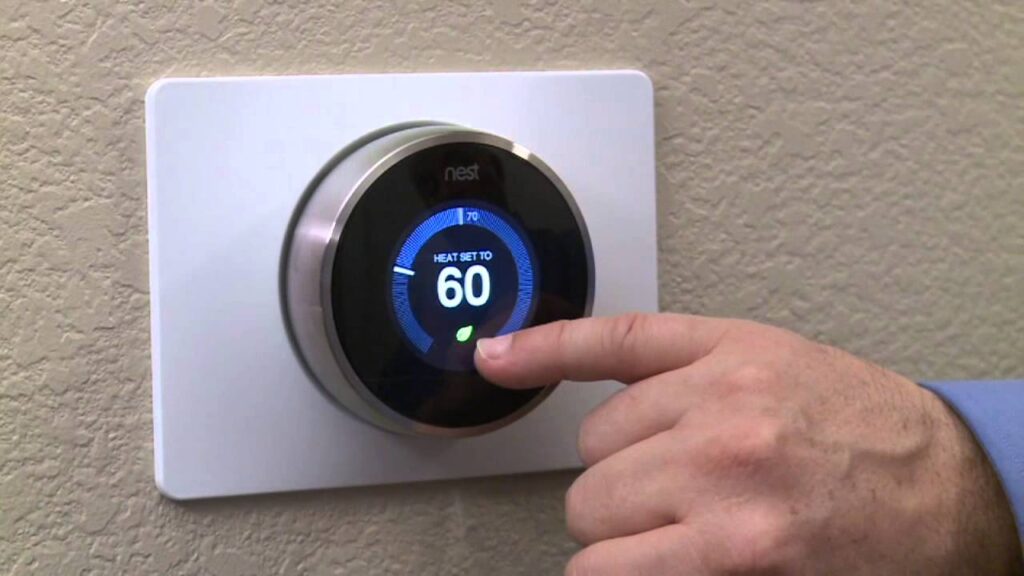
Correct thermostat wiring is the foundation of a successful Nest thermostat installation. Whether you’re replacing an older thermostat or installing a smart thermostat for the first time, understanding how thermostat wires connect to your HVAC system is essential for safe operation and reliable performance.
Although many homeowners assume thermostat wiring is straightforward, every HVAC system has unique wiring configurations. Heat pumps, furnaces, boilers, multi stage systems, and conventional air conditioning units all use different wiring arrangements. Connecting wires incorrectly can prevent your heating or cooling system from operating properly and may even damage HVAC components.
This complete Nest thermostat wiring guide explains thermostat wire functions, common wiring configurations, C wire requirements, compatibility considerations, installation steps, troubleshooting techniques, and when professional assistance is recommended.
What Is Nest Thermostat Wiring?
Nest thermostat wiring is the process of connecting your thermostat to your home’s HVAC system using low voltage control wires.
These wires allow the thermostat to communicate with heating and cooling equipment by sending electrical signals that activate specific functions such as:
- Heating
- Cooling
- Fan operation
- Heat pump control
- Emergency heat
- Multi stage heating
- Multi stage cooling
Each wire connects to a specific terminal inside the Nest thermostat, allowing it to control different HVAC functions.
Why Proper Thermostat Wiring Matters
Correct wiring affects every aspect of your HVAC system.
Proper installation helps ensure:
Safe HVAC Operation
Correct wiring prevents:
- Short circuits
- Electrical faults
- Equipment damage
- Communication failures
Accurate Temperature Control
When wires are connected correctly, the thermostat accurately communicates with:
- Furnace
- Air conditioner
- Heat pump
- Fan system
- Boiler
Reliable Smart Features
Proper wiring allows smart functions including:
- Google Home integration
- WiFi connectivity
- Smart scheduling
- Home and Away Assist
- Eco Mode
Long Term Equipment Protection
Incorrect wiring can cause excessive HVAC cycling and unnecessary wear on expensive components.
Professional wiring helps protect your heating and cooling investment.
Understanding Nest Thermostat Wire Terminals
Every wire has a specific purpose.
Below are the most common thermostat terminals.
R Wire
Provides 24 volt power from the HVAC transformer.
Rc Wire
Supplies cooling power.
Rh Wire
Supplies heating power.
C Wire (Common Wire)
The Common wire provides continuous power to the Nest thermostat.
Although some Nest models operate without a C wire, certain HVAC systems require one for reliable performance.
Y Wire
Controls air conditioning and cooling operation.
W Wire
Activates the heating system.
G Wire
Controls the indoor blower fan.
O/B Wire
Used with heat pump reversing valves.
AUX Wire
Controls auxiliary heating systems.
E Wire
Activates emergency heat.
Benefits of Correct Nest Thermostat Wiring
Improved HVAC Performance
Proper wiring allows heating and cooling equipment to operate efficiently.
Better Energy Efficiency
Correct communication between the thermostat and HVAC system reduces unnecessary energy consumption.
Faster System Response
Proper wiring improves response time when switching between heating and cooling modes.
Reliable Smart Features
Correct electrical connections ensure remote control, scheduling, notifications, and automation function correctly.
Reduced Maintenance
Proper wiring minimizes service calls related to thermostat communication problems.
Step by Step Nest Thermostat Wiring Guide
Step 1: Turn Off HVAC Power
Always disconnect electrical power before touching thermostat wiring.
This protects both the installer and HVAC equipment.
Step 2: Remove Existing Thermostat
Carefully remove the thermostat cover.
Before disconnecting wires:
- Photograph wiring
- Label every wire
- Record terminal locations
Step 3: Identify Every Wire
Common wires include:
- R
- Rc
- Rh
- W
- Y
- G
- C
- O/B
- AUX
- E
Never assume wire colors indicate function.
Always verify terminal labels.
Step 4: Check HVAC Compatibility
Determine whether your system uses:
- Furnace
- Boiler
- Heat pump
- Multi stage HVAC
- Conventional air conditioning
Different systems require different wiring configurations.
Step 5: Install the Nest Base Plate
Secure the mounting plate firmly.
Ensure:
- Proper alignment
- Stable mounting
- Easy wire access
Step 6: Connect Wires
Insert each wire into the appropriate Nest terminal.
Verify:
- Secure connection
- Correct terminal
- Proper insulation
Incorrect wire placement is the most common installation mistake.
Step 7: Attach the Thermostat
Install the Nest display onto the mounting base.
The thermostat should power on automatically.
Step 8: Configure the System
Follow the setup wizard to configure:
- Heating type
- Cooling type
- Heat pump settings
- Fan operation
- WiFi
- Google Home
Step 9: Test Every Function
Verify:
- Heating
- Cooling
- Fan
- Auto Mode
- Smart scheduling
Step 10: Monitor Performance
Observe system performance during the first few days.
Watch for:
- Temperature accuracy
- HVAC cycling
- WiFi stability
- Smart feature operation
Tools Required
Professional installers typically use:
- Phillips screwdriver
- Flat screwdriver
- Voltage tester
- Wire stripper
- Electrical tape
- Drill
- Wire labels
- Smartphone
- Google Home App
- HVAC wiring diagram
Common Nest Thermostat Wiring Mistakes
Misidentifying Wires
Wire colors vary between homes.
Always rely on terminal labels.
Skipping the C Wire Check
Some HVAC systems require a Common wire or Nest Power Connector.
Ignoring this may cause intermittent power problems.
Loose Wire Connections
Loose wiring can result in:
- System failure
- Thermostat rebooting
- Heating problems
- Cooling interruptions
Installing With Power On
Always switch off power before wiring.
Ignoring Compatibility
Every HVAC system has unique wiring requirements.
Always confirm compatibility before installation.
Professional Wiring vs DIY Wiring
| Professional Wiring | DIY Wiring |
|---|---|
| Accurate wire identification | Higher chance of mistakes |
| HVAC compatibility verification | Manual checking |
| Safe installation | Increased risk |
| Complete system testing | Basic testing |
| Faster installation | Longer installation |
| Lower troubleshooting risk | Greater possibility of errors |
Understanding the C Wire
One of the most common questions homeowners ask during installation is whether a C Wire (Common Wire) is required.
A C Wire provides continuous low voltage power to the Nest thermostat, ensuring stable operation and uninterrupted access to smart features.
Some newer Nest thermostat models can operate without a C Wire by drawing power from the HVAC system. However, this is not suitable for every installation.
A C Wire is commonly recommended for:
- Heat pump systems
- Multi stage HVAC systems
- Older furnaces
- High efficiency HVAC equipment
- Systems experiencing low power warnings
If your HVAC system does not include a Common Wire, a professional installer may recommend installing a Nest Power Connector or running a new C Wire to improve long term reliability.
What Is a Nest Power Connector?
The Nest Power Connector is an accessory designed for HVAC systems that do not have a dedicated C Wire.
It provides stable power to compatible Nest thermostats without requiring new thermostat wiring inside the walls.
Benefits include:
- Improved thermostat stability
- Fewer low power warnings
- Better WiFi reliability
- Reduced thermostat restarting
- Improved compatibility with older HVAC systems
Installing a Power Connector may require access to your HVAC control board, making professional installation a safer option for many homeowners.
Heat Pump Wiring Considerations
Heat pump systems use additional control wires that differ from conventional heating and cooling equipment.
Common heat pump wiring includes:
- O/B terminal
- Auxiliary Heat
- Emergency Heat
- Compressor stages
- Fan control
Improper heat pump wiring may result in:
- Heating when cooling is selected
- Cooling when heating is selected
- Constant fan operation
- Auxiliary heat running unnecessarily
Professional configuration helps ensure every heating stage operates correctly.
Multi Stage HVAC Wiring
Modern HVAC systems often include multiple heating and cooling stages to improve efficiency.
Nest thermostats support many multi stage systems, but proper wiring and configuration are essential.
A technician will verify:
- Stage one heating
- Stage two heating
- Stage one cooling
- Stage two cooling
- Auxiliary heat
- Fan operation
Accurate staging improves comfort while reducing unnecessary energy consumption.
Nest Thermostat Wiring Troubleshooting
Even after installation, homeowners may occasionally experience wiring related issues. Fortunately, many problems can be identified and resolved with a systematic approach.
Thermostat Will Not Turn On
Possible causes include:
- No power from the HVAC system
- Loose wiring connections
- Missing Common (C) wire
- Tripped circuit breaker
- Faulty HVAC transformer
Heating Is Not Working
Common reasons include:
- Incorrect W wire connection
- Furnace configuration issues
- Heating stage settings
- Loose thermostat terminals
Cooling Is Not Working
Possible causes include:
- Incorrect Y wire connection
- Compressor wiring issues
- Cooling configuration settings
- HVAC system faults
Fan Runs Constantly
Continuous fan operation may result from:
- Incorrect G wire connection
- Fan settings
- HVAC control board issues
- Software configuration errors
Low Power Warning
Low power notifications often indicate:
- Missing C Wire
- Weak HVAC transformer
- Loose wiring
- Power Connector installation required
When Should You Hire a Professional?
Although many Nest thermostat installations are straightforward, professional assistance is highly recommended when working with complex HVAC systems.
Consider hiring a professional if:
- Your thermostat wiring is unlabeled.
- Your HVAC system includes a heat pump.
- You have a boiler or radiant heating system.
- Your home uses zoning controls.
- A C Wire installation is required.
- The thermostat displays wiring errors.
- Heating or cooling fails after installation.
- You want complete Google Home integration.
Professional installation reduces the risk of wiring mistakes while ensuring your HVAC system performs efficiently.
Best Practices for Long Term Performance
After completing the wiring and setup process, follow these recommendations to maximize performance.
Inspect Wiring Periodically
Loose terminals can develop over time due to vibration or equipment servicing.
Inspect wiring annually during HVAC maintenance.
Keep Software Updated
Firmware updates improve:
- Compatibility
- Security
- Smart features
- System reliability
Review Energy Reports
Use Google Home to monitor:
- Heating runtime
- Cooling runtime
- Energy saving opportunities
- Temperature history
Schedule Seasonal HVAC Maintenance
Professional servicing helps ensure both your thermostat and HVAC equipment continue operating efficiently throughout the year.
Frequently Asked Questions
Does every Nest thermostat require a C Wire?
No. Some Nest thermostat models can operate without a C Wire. However, many HVAC systems perform more reliably with a dedicated Common Wire or Nest Power Connector.
Can I use existing thermostat wiring?
In many cases, yes. Existing low voltage thermostat wiring is compatible, provided it meets Nest’s installation requirements and is in good condition.
What happens if I connect the wires incorrectly?
Incorrect wiring may cause:
- Heating failures
- Cooling failures
- Fan problems
- Thermostat errors
- Potential HVAC equipment damage
Always verify terminal assignments before powering on the system.
Can Nest thermostats work with heat pumps?
Yes. Nest thermostats support many heat pump systems when properly wired and configured.
Why does my Nest thermostat keep restarting?
Frequent restarting is often caused by:
- Insufficient power
- Missing C Wire
- Loose wiring
- HVAC compatibility issues
- Software configuration errors
How do I know if my wiring is compatible?
Review your HVAC system documentation or use Google’s compatibility checker. A professional installer can also inspect your wiring before installation.
Is professional wiring worth it?
Yes. Professional wiring minimizes installation errors, protects HVAC equipment, and ensures optimal thermostat performance.
How long does thermostat wiring last?
Quality low voltage thermostat wiring can last for many years when properly installed and protected from physical damage.
Conclusion
Correct Nest thermostat wiring is one of the most important factors in achieving reliable heating, cooling, and smart home performance. From identifying thermostat terminals and understanding C Wire requirements to configuring heat pumps and multi stage HVAC systems, every connection plays a critical role in system efficiency.
While many homeowners complete standard thermostat wiring, more complex installations often benefit from professional expertise. Proper wiring helps protect your HVAC investment, reduces troubleshooting, and ensures your Nest thermostat delivers the comfort, convenience, and energy savings it was designed to provide.