
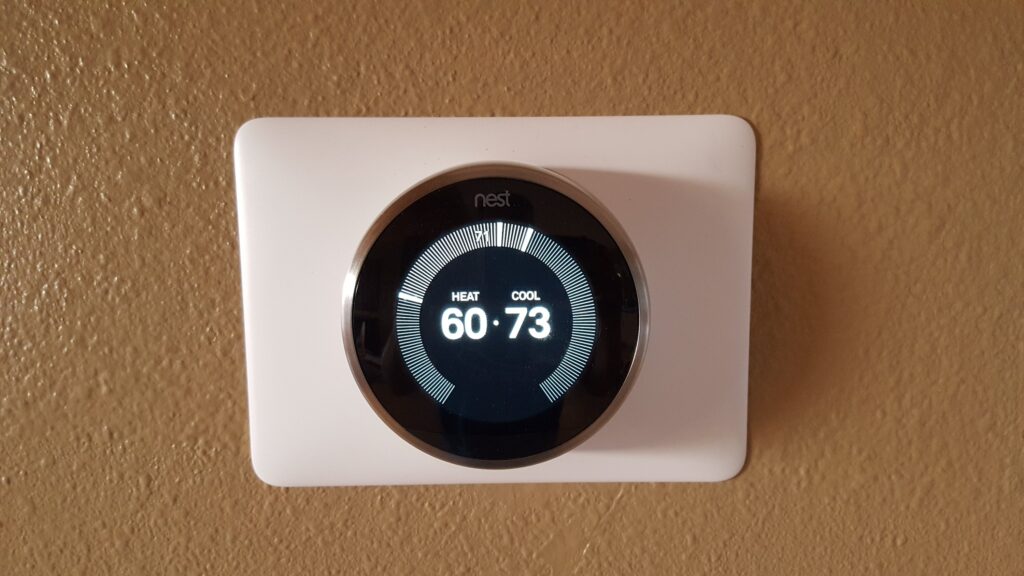
Modern HVAC systems rely on intelligent temperature control to improve comfort, reduce energy consumption, and simplify everyday living. A Nest controller serves as the communication hub between your smart thermostat and your home’s heating and cooling equipment, allowing precise temperature management and seamless smart home integration.
Whether you’re upgrading an older thermostat, replacing an existing controller, or installing a Nest controller for the first time, proper installation and configuration are essential for reliable performance. Incorrect wiring, poor placement, or compatibility issues can affect heating, cooling, and energy efficiency.
This comprehensive Nest controller installation guide explains how the installation process works, what equipment is required, common installation mistakes, troubleshooting tips, and when professional installation is the best option.
What Is a Nest Controller?
A Nest controller is the component responsible for communicating between your Google Nest thermostat and your HVAC equipment. Depending on your heating and cooling system, the controller manages signals that activate heating, cooling, fan operation, and temperature regulation.
The controller works together with the Nest thermostat to deliver:
- Automatic temperature control
- Heating and cooling management
- Smart scheduling
- Energy saving automation
- Remote operation
- Smart home integration
- HVAC system monitoring
Proper controller installation ensures accurate communication between your thermostat and HVAC equipment.
Why Proper Nest Controller Installation Matters
Many homeowners focus only on the thermostat itself, but the controller plays an equally important role.
A correctly installed controller helps ensure:
Reliable HVAC Communication
The controller sends commands between the thermostat and:
- Air conditioner
- Furnace
- Heat pump
- Boiler
- Fan system
Poor installation may interrupt communication, resulting in heating or cooling failures.
Improved Energy Efficiency
Correct controller configuration helps the thermostat regulate temperatures efficiently while reducing unnecessary HVAC operation.
Benefits include:
- Lower electricity usage
- Reduced HVAC cycling
- Consistent indoor temperatures
- Longer equipment lifespan
Better Smart Home Performance
The controller enables smart features including:
- Google Home integration
- Mobile control
- Voice commands
- Smart scheduling
- Home automation
Equipment Protection
Incorrect controller wiring can place unnecessary stress on HVAC equipment.
Professional installation helps protect expensive components by ensuring safe electrical connections.
Benefits of Proper Nest Controller Installation
Accurate Temperature Control
Correct installation allows the controller to communicate temperature changes quickly and accurately.
Faster HVAC Response
A properly configured controller improves response time when switching between heating and cooling modes.
Reliable Smart Features
Professional setup ensures:
- Remote access
- Smart schedules
- Occupancy detection
- Eco Mode
- Weather adaptation
operate correctly.
Reduced Maintenance Problems
Correct installation reduces the likelihood of:
- Wiring faults
- Controller errors
- Communication failures
- Thermostat disconnects
Improved Comfort
Consistent controller performance helps maintain comfortable indoor temperatures throughout the year.
Step by Step Nest Controller Installation
Step 1: Verify HVAC Compatibility
Before installation, determine whether your HVAC equipment supports the Nest controller.
Check:
- Heating type
- Cooling type
- Voltage
- Wiring configuration
- Multi stage compatibility
Step 2: Turn Off Electrical Power
Always disconnect power to the HVAC system before working with thermostat wiring.
This helps prevent:
- Electrical shock
- Equipment damage
- Short circuits
Step 3: Inspect Existing Wiring
Examine the thermostat wiring carefully.
Identify:
- R wire
- C wire
- W wire
- Y wire
- G wire
- Additional terminals
Label every wire before disconnecting.
Step 4: Install the Controller
Mount the controller securely according to manufacturer recommendations.
Ensure:
- Stable mounting
- Proper ventilation
- Easy cable routing
- Safe positioning
Step 5: Connect Wiring
Insert each wire into the correct terminal.
Double check:
- Terminal assignments
- Wire security
- Connector placement
- Electrical integrity
Incorrect wiring remains the leading cause of controller installation problems.
Step 6: Connect the Nest Thermostat
Once wiring is complete, connect the Nest thermostat to the controller.
Verify communication between:
- Thermostat
- Controller
- HVAC equipment
Step 7: Configure Software
Using the thermostat interface, configure:
- Heating system
- Cooling system
- Fan operation
- Temperature preferences
- Smart scheduling
- WiFi connection
- Google Home integration
Step 8: Test Every Function
Verify:
- Heating operation
- Cooling operation
- Fan control
- Automatic scheduling
- Remote access
- Mobile app communication
A complete functional test ensures reliable operation.
Tools Required
Professional installers commonly use:
- Phillips screwdriver
- Flat screwdriver
- Wire stripper
- Voltage tester
- Electrical tape
- Wire labels
- Drill
- Smartphone
- Google Home App
- HVAC wiring diagram
These tools help ensure safe and accurate installation.
Common Mistakes During Nest Controller Installation
Incorrect Wiring
Incorrect wire placement can prevent communication between the thermostat and HVAC equipment.
Skipping Compatibility Checks
Installing an incompatible controller may result in:
- Heating failure
- Cooling problems
- Thermostat errors
- Equipment damage
Ignoring Power Safety
Never install a controller while the HVAC system remains energized.
Loose Wire Connections
Loose wiring often causes:
- Intermittent failures
- Controller disconnects
- Temperature fluctuations
Incorrect Configuration
Failure to configure HVAC settings correctly may reduce system efficiency.
Professional Installation vs DIY Installation
| Professional Installation | DIY Installation |
| HVAC compatibility verification | User checks compatibility |
| Expert wiring | Higher wiring risk |
| Complete testing | Basic testing |
| Smart home integration | Manual configuration |
| Faster installation | Longer installation time |
| Lower troubleshooting risk | Higher chance of errors |
| Professional support | Self troubleshooting |
When Should You Hire a Professional for Nest Controller Installation?
Although some homeowners successfully install a Nest controller themselves, not every HVAC system is simple. Modern heating and cooling systems often include advanced wiring, multiple heating stages, zoning controls, or heat pump configurations that require technical expertise.
Hiring a professional installer helps ensure your Nest controller is installed safely, configured correctly, and fully compatible with your HVAC equipment.
Your HVAC System Is Complex
Professional installation is recommended if your property includes:
- Multi stage heating or cooling systems
- Heat pumps
- Dual fuel HVAC systems
- Zoned HVAC systems
- Boiler based heating
- Radiant floor heating
- Commercial HVAC equipment
These systems require accurate controller programming to prevent operational issues.
Your Wiring Is Unclear
Older properties often have thermostat wiring that is:
- Unlabeled
- Faded
- Modified over time
- Missing a Common (C) wire
A professional technician can identify each wire correctly and ensure safe installation.
You’re Upgrading an Older Thermostat
Replacing a conventional thermostat with a Nest controller may require:
- Wiring modifications
- Power connector installation
- Compatibility verification
- HVAC control board adjustments
Professional installation reduces the risk of damaging expensive HVAC components.
You’re Experiencing Heating or Cooling Problems
If your HVAC system doesn’t respond correctly after installation, an experienced installer can diagnose issues such as:
- Incorrect wiring
- Controller configuration errors
- Faulty HVAC communication
- Software settings
- Compatibility conflicts
You Want Full Smart Home Integration
Professional setup ensures your Nest controller works seamlessly with:
- Google Home
- Smart displays
- Voice assistants
- Mobile devices
- Smart routines
- Home automation systems
Advanced Tips for Optimizing Your Nest Controller
Installing the controller is only the beginning. These optimization tips help improve long term performance and energy efficiency.
Keep Firmware Updated
Firmware updates provide:
- Better stability
- Enhanced compatibility
- Improved security
- New smart features
- Performance improvements
Always allow automatic updates whenever possible.
Review Energy Usage
The Google Home app provides valuable information including:
- Daily heating usage
- Cooling trends
- Energy saving recommendations
- Runtime history
Monitoring this data helps improve efficiency over time.
Optimize Temperature Schedules
Instead of relying entirely on manual adjustments, create schedules that match your lifestyle.
Examples include:
Morning
Comfort temperatures before waking.
Daytime
Energy saving settings while the home is unoccupied.
Evening
Comfort settings when everyone returns.
Night
Reduced HVAC operation while sleeping.
Maintain Stable WiFi
A strong wireless connection ensures:
- Remote control
- Automatic updates
- Smart notifications
- Home automation
- Reliable communication
If your thermostat is far from the router, consider improving WiFi coverage.
Perform Seasonal Checks
Review controller settings before summer and winter.
Verify:
- Heating mode
- Cooling mode
- Fan operation
- Temperature calibration
- Schedule accuracy
Seasonal adjustments improve comfort and efficiency.
Frequently Asked Questions
What does a Nest controller do?
A Nest controller communicates between your Nest thermostat and your HVAC system, allowing it to control heating, cooling, fan operation, and smart temperature management.
How long does Nest controller installation take?
Most installations take between 45 minutes and 2 hours, depending on the complexity of the HVAC system and whether additional wiring or configuration is required.
Can I install a Nest controller myself?
Many standard HVAC systems support DIY installation. However, homes with heat pumps, zoning systems, multi stage equipment, or complicated wiring should consider professional installation.
Why isn’t my Nest controller working?
Common causes include:
- Incorrect wiring
- Loose wire connections
- HVAC compatibility issues
- Incorrect controller configuration
- Missing Common (C) wire
- Power supply problems
Does a Nest controller require WiFi?
Basic heating and cooling functions may still operate without WiFi, but smart features such as remote control, energy reports, software updates, and Google Home integration require an internet connection.
Can a Nest controller work with older HVAC systems?
Many older HVAC systems are compatible, but compatibility should always be verified before installation. Some systems may require additional accessories such as a Power Connector or Common wire.
Will installing a Nest controller reduce energy bills?
When configured correctly, a Nest controller helps optimize heating and cooling schedules, reducing unnecessary HVAC runtime and improving overall energy efficiency.
Is professional installation worth it?
Yes. Professional installation helps ensure compatibility, proper wiring, thorough testing, and optimal smart home integration while reducing the risk of costly HVAC issues.
Conclusion
A properly installed Nest controller is essential for maximizing the performance of your smart thermostat and HVAC system. Beyond simply connecting wires, correct installation ensures reliable communication, accurate temperature control, energy-efficient operation, and seamless smart home integration.
Whether you’re upgrading an existing thermostat or installing a Nest controller for the first time, careful planning and proper configuration help prevent common installation problems while extending the life of your heating and cooling equipment.
For complex HVAC systems or homeowners who want complete peace of mind, professional installation remains the safest and most reliable solution.