
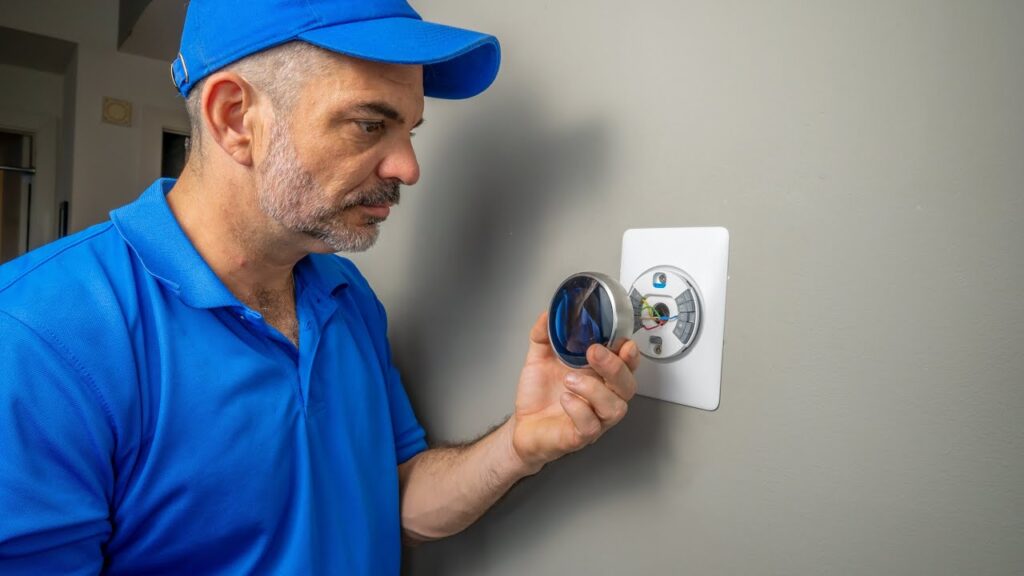
The Nest Learning Thermostat is one of the most advanced smart thermostats available for modern homes. Designed to automatically learn your heating and cooling preferences, it helps improve comfort, reduce energy consumption, and simplify temperature management through intelligent automation.
Whether you’re replacing an outdated thermostat or upgrading your smart home, proper installation is essential for achieving the best performance. Correct wiring, accurate HVAC configuration, and complete software setup ensure the thermostat communicates effectively with your heating and cooling system.
This comprehensive Nest Learning Thermostat installation guide explains everything you need to know, including compatibility checks, installation steps, wiring considerations, setup, troubleshooting, and when professional installation is the best choice.
What Is a Nest Learning Thermostat?
The Nest Learning Thermostat is a smart thermostat that automatically learns your daily routine and adjusts indoor temperatures to improve comfort and energy efficiency.
Unlike conventional thermostats that require constant manual adjustments, the Nest Learning Thermostat gradually creates personalized heating and cooling schedules based on your habits.
Its intelligent features include:
- Learning temperature preferences
- Automatic scheduling
- Home and Away Assist
- Eco Mode
- Energy history
- Remote access
- Google Home integration
- Voice control
- Smart notifications
These features make it one of the most advanced smart climate control devices available for residential properties.
Why Proper Installation Matters
Although the thermostat is designed for easy installation, correct configuration is essential for reliable operation.
Proper installation ensures:
HVAC Compatibility
Every home has a different heating and cooling system.
The Nest Learning Thermostat supports many systems including:
- Gas furnaces
- Electric furnaces
- Central air conditioning
- Heat pumps
- Boilers
- Multi stage HVAC systems
Compatibility should always be confirmed before installation.
Reliable Temperature Control
Correct installation ensures accurate communication between the thermostat and your HVAC equipment.
This improves:
- Heating performance
- Cooling performance
- Temperature accuracy
- Indoor comfort
Maximum Energy Efficiency
The thermostat’s energy saving features only perform correctly when installation and configuration are completed properly.
Smart Home Integration
Professional setup enables seamless integration with:
- Google Home
- Smart speakers
- Smart displays
- Mobile devices
- Voice assistants
- Home automation routines
Benefits of Installing a Nest Learning Thermostat
Learns Your Daily Routine
The thermostat gradually adapts to your schedule without requiring constant programming.
Lower Energy Bills
Automatic scheduling helps reduce unnecessary heating and cooling, improving overall energy efficiency.
Remote Access
Control your home’s temperature from virtually anywhere using the Google Home app.
Intelligent Automation
The thermostat automatically adjusts temperatures based on:
- Occupancy
- Time of day
- Weather
- Seasonal changes
Energy Reports
Detailed reports help homeowners understand energy usage and identify additional savings opportunities.
Smart Home Compatibility
The Nest Learning Thermostat integrates with modern smart home ecosystems for enhanced convenience.
Step by Step Nest Learning Thermostat Installation
Step 1: Verify Compatibility
Before purchasing or installing the thermostat, confirm compatibility with your HVAC system.
Review:
- Heating equipment
- Cooling equipment
- Wiring
- Voltage
- Existing thermostat connections
Step 2: Turn Off HVAC Power
Always disconnect power at the circuit breaker before beginning installation.
This protects both the thermostat and HVAC equipment.
Step 3: Remove Existing Thermostat
Carefully remove the thermostat cover.
Before disconnecting wires:
- Photograph wiring
- Label each wire
- Record terminal locations
Accurate documentation simplifies installation.
Step 4: Inspect Wiring
Identify the following wires where applicable:
- R
- Rc
- Rh
- W
- Y
- G
- C
- O/B
- AUX
- E
Do not rely solely on wire colors.
Always verify terminal labels.
Step 5: Install the Mounting Plate
Secure the Nest mounting plate firmly to the wall.
Verify:
- Proper alignment
- Secure mounting
- Correct wire routing
Step 6: Connect Thermostat Wires
Insert every wire into its corresponding terminal.
Double check:
- Terminal assignments
- Wire security
- Connection quality
Incorrect wiring remains one of the most common installation problems.
Step 7: Install the Display
Attach the Nest Learning Thermostat display to the mounting plate.
Restore HVAC power.
The thermostat should automatically power on.
Step 8: Configure the Thermostat
Complete the setup wizard by selecting:
- Language
- WiFi
- Home location
- HVAC equipment
- Heating preferences
- Cooling preferences
Step 9: Connect Google Home
Link the thermostat with your Google account.
Benefits include:
- Remote access
- Smart scheduling
- Voice control
- Automation
- Energy monitoring
Step 10: Test Every Function
Verify:
- Heating
- Cooling
- Fan operation
- Schedule creation
- WiFi connectivity
- Mobile app communication
Testing confirms successful installation.
Tools Required
Professional installers commonly use:
- Screwdrivers
- Wire stripper
- Voltage tester
- Drill
- Electrical tape
- Wire labels
- Smartphone
- Google Home App
- HVAC wiring diagram
Common Installation Mistakes
Incorrect Wiring
Misidentified wires remain the leading cause of installation failures.
Ignoring Compatibility
Installing an incompatible thermostat may result in poor HVAC performance.
Skipping WiFi Setup
Without WiFi, many smart features become unavailable.
Improper Thermostat Placement
Avoid installing the thermostat near:
- Windows
- Air vents
- Direct sunlight
- Kitchens
- Exterior doors
Ignoring Firmware Updates
Software updates improve performance, compatibility, and security.
Professional Installation vs DIY Installation
| Professional Installation | DIY Installation |
| HVAC compatibility verification | Manual compatibility checking |
| Expert wiring | Higher wiring risk |
| Complete testing | Basic testing |
| Google Home integration | Manual setup |
| Faster installation | Longer installation |
| Professional troubleshooting | Self troubleshooting |
| Lower installation risk | Greater chance of errors |
Advanced Features of the Nest Learning Thermostat
The Nest Learning Thermostat is more than a programmable thermostat. It uses intelligent technology to optimize your home’s heating and cooling based on your daily habits and preferences.
Understanding these features helps you maximize comfort while reducing energy consumption.
Auto Schedule
One of the most valuable features is Auto Schedule.
Instead of manually programming temperatures, the thermostat learns your routine over time and automatically creates a personalized heating and cooling schedule.
Benefits include:
- Less manual adjustment
- Improved indoor comfort
- Reduced energy waste
- Automatic schedule optimization
Home and Away Assist
Using built in sensors and your mobile device location, the thermostat detects whether someone is home.
When everyone leaves, it automatically switches to energy saving temperatures.
When someone returns, it restores your preferred comfort settings.
Eco Mode
Eco Mode helps minimize unnecessary HVAC operation during periods when the home is unoccupied.
Advantages include:
- Lower utility bills
- Reduced HVAC runtime
- Increased equipment lifespan
- Better overall efficiency
Energy History
The thermostat records valuable information about heating and cooling performance.
You can review:
- Daily energy usage
- Heating runtime
- Cooling runtime
- Temperature adjustments
- Energy saving recommendations
Monitoring this data helps identify opportunities for additional savings.
Remote Control
After connecting the thermostat to the Google Home app, homeowners can:
- Change temperatures remotely
- Create schedules
- Receive notifications
- Monitor system performance
- Control multiple thermostats
C Wire and Power Requirements
One of the most common installation questions concerns the Common Wire (C Wire).
A C Wire supplies continuous low voltage power to the thermostat.
Although many Nest Learning Thermostat models can operate without a dedicated C Wire, certain HVAC systems require one for stable performance.
Systems that often benefit from a C Wire include:
- Heat pumps
- Multi stage HVAC systems
- Older furnaces
- High efficiency HVAC equipment
If your HVAC system lacks a Common Wire, a Nest Power Connector may provide a practical solution without running additional wiring through the walls.
When Should You Hire a Professional?
Many homeowners successfully install a Nest Learning Thermostat themselves. However, professional installation is strongly recommended in certain situations.
Consider hiring an experienced technician if:
- Your thermostat wiring is unclear.
- Your home has a heat pump.
- You have a multi stage HVAC system.
- Your property uses zoning controls.
- A C Wire installation is required.
- The thermostat fails to power on.
- Heating or cooling does not respond correctly.
- You want complete Google Home integration.
Professional installation helps ensure compatibility, safe wiring, accurate configuration, and reliable long term performance.
Tips for Getting the Best Performance
Once installation is complete, these best practices can help maximize your thermostat’s efficiency.
Create an Initial Schedule
Although the thermostat learns automatically, creating an initial schedule allows it to optimize your comfort more quickly.
Keep WiFi Connected
A stable internet connection enables:
- Automatic software updates
- Remote access
- Energy reports
- Smart home integration
- Voice control
Review Energy Reports Regularly
Monitoring your energy usage helps identify opportunities to reduce heating and cooling costs while improving efficiency.
Perform Seasonal Adjustments
Review your heating and cooling schedules before summer and winter to ensure optimal comfort throughout the year.
Schedule HVAC Maintenance
Regular maintenance helps your heating and cooling system operate efficiently while supporting accurate thermostat performance.
Frequently Asked Questions
How long does Nest Learning Thermostat installation take?
Most installations take 30 minutes to 2 hours, depending on HVAC system complexity and any wiring modifications required.
Does the Nest Learning Thermostat require a C Wire?
Not always. Many systems operate without a C Wire, while others require either a Common Wire or a Nest Power Connector for reliable operation.
Can I install the Nest Learning Thermostat myself?
Yes. Many homeowners complete installation successfully. However, complex HVAC systems should be installed by a qualified professional.
Does the Nest Learning Thermostat work with heat pumps?
Yes. It supports many heat pump systems when properly wired and configured.
Why isn’t my Nest Learning Thermostat turning on?
Possible causes include:
- Incorrect wiring
- No HVAC power
- Missing C Wire
- Loose connections
- HVAC compatibility issues
Can the thermostat lower my energy bills?
Yes. Smart scheduling, occupancy detection, and energy optimization help reduce unnecessary heating and cooling usage.
How long does it take to learn my schedule?
Most Nest Learning Thermostats begin learning within a few days and continue improving schedules over the following weeks based on your temperature adjustments.
Is professional installation worth it?
Yes. Professional installation helps prevent wiring errors, ensures HVAC compatibility, optimizes smart features, and reduces the likelihood of future system issues.
Conclusion
The Nest Thermostat is one of the most advanced smart climate control solutions available today. When installed and configured correctly, it provides intelligent temperature management, improved comfort, lower energy consumption, and seamless smart home integration.
Whether you’re upgrading from a traditional thermostat or enhancing an existing smart home, proper installation is essential for achieving the thermostat’s full potential. From compatibility checks and wiring to software configuration and ongoing optimization, every step contributes to reliable long term performance.
For homeowners with complex HVAC systems or those seeking complete peace of mind, professional installation remains the safest and most efficient solution.