
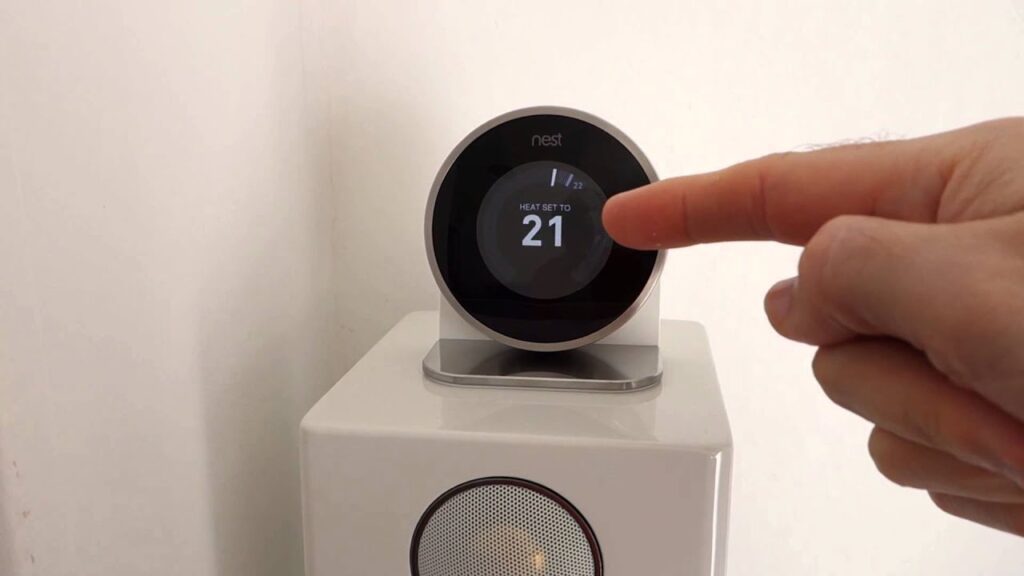
Setting up a Nest thermostat is one of the easiest ways to modernize your home’s heating and cooling system while improving energy efficiency and comfort. Unlike traditional thermostats, Google Nest thermostats are designed to learn your routine, optimize temperature settings, and provide remote access through your smartphone.
Whether you’ve just purchased a new Nest thermostat or recently completed the installation, proper setup is essential for unlocking all of its smart features. From connecting to WiFi and configuring your HVAC system to creating personalized schedules and integrating with your smart home devices, every step contributes to better performance and long term reliability.
This beginner friendly guide explains the complete Nest thermostat setup process, common configuration mistakes, troubleshooting tips, and when professional setup is the better option. By the end of this guide, you’ll understand how to maximize the performance of your Nest thermostat while creating a more comfortable and energy efficient home.
What Is Nest Thermostat Setup?
Nest thermostat setup is the process of configuring your thermostat after physical installation. While installing the thermostat involves mounting the device and connecting wires, setup focuses on software configuration, system optimization, and smart home integration.
A complete Nest thermostat setup typically includes:
- Connecting the thermostat to WiFi
- Linking the thermostat with the Google Home app
- Configuring your heating and cooling system
- Selecting your home location
- Setting preferred temperatures
- Creating heating and cooling schedules
- Enabling Eco Mode
- Activating Home and Away routines
- Updating firmware
- Testing heating and cooling performance
Proper setup allows your thermostat to communicate with your HVAC system efficiently while learning your daily routine for automatic temperature adjustments.
Why Proper Nest Thermostat Setup Matters
Many homeowners believe that simply installing the thermostat is enough. In reality, the setup process determines how efficiently your thermostat performs over the coming years.
Improved Energy Efficiency
One of the biggest advantages of a Nest thermostat is its ability to reduce unnecessary heating and cooling.
Correct setup helps the thermostat:
- Learn your daily schedule
- Detect occupancy
- Adjust temperatures automatically
- Reduce energy waste
- Lower monthly utility costs
Better Indoor Comfort
Accurate configuration ensures your HVAC system maintains consistent indoor temperatures throughout the day.
Instead of manually adjusting temperatures, Nest automatically creates comfortable conditions based on your routine.
Reliable Smart Home Integration
During setup, your thermostat connects with:
- Google Home
- Mobile devices
- Voice assistants
- Home automation routines
- Smart displays
This allows you to control your home’s temperature from virtually anywhere.
Accurate HVAC Configuration
Every home has a different heating and cooling system.
During setup, Nest identifies whether your home uses:
- Central air conditioning
- Heat pump
- Gas furnace
- Electric furnace
- Boiler
- Multi stage HVAC system
Correct system detection ensures proper operation.
Benefits of Proper Nest Thermostat Setup
A properly configured Nest thermostat delivers significantly more value than one operating with default settings.
Smart Learning Technology
Nest gradually learns your preferred temperatures and daily schedule.
After several days of use, it automatically adjusts temperatures based on your habits.
Remote Temperature Control
Using the Google Home app, homeowners can:
- Adjust temperatures remotely
- Change schedules
- Activate Eco Mode
- Monitor system activity
- Receive notifications
Lower Energy Bills
Smart scheduling helps reduce unnecessary HVAC operation by automatically lowering heating or cooling when nobody is home.
Automatic Software Updates
Connecting your thermostat to WiFi ensures it receives the latest firmware updates, security improvements, and feature enhancements.
Home Automation
Nest integrates with numerous smart home devices, allowing routines such as:
- Good Morning
- Good Night
- Away Mode
- Vacation Mode
- Energy Saving schedules
Equipment Protection
Proper configuration prevents excessive HVAC cycling, helping reduce wear on expensive heating and cooling equipment.
Step by Step Nest Thermostat Setup Guide
Step 1: Power On the Thermostat
Once installation is complete, restore power to your HVAC system.
The Nest thermostat should automatically turn on and begin the setup wizard.
Step 2: Select Language
Choose your preferred language using the thermostat display.
The setup menu is designed to be simple and user friendly.
Step 3: Connect to WiFi
A reliable internet connection is required for smart features.
Select your home WiFi network and enter the password.
A successful connection allows the thermostat to:
- Receive software updates
- Enable remote access
- Sync with Google Home
- Download weather information
- Learn energy saving recommendations
Step 4: Add the Thermostat to Google Home
Download the Google Home application.
Sign in using your Google account.
Add your Nest thermostat by scanning the QR code or entering the setup key displayed on the thermostat.
Once connected, you’ll be able to:
- Control temperatures remotely
- View energy reports
- Manage multiple devices
- Create automation routines
- Receive notifications
Step 5: Configure HVAC Equipment
The thermostat automatically detects many HVAC systems.
Review the detected equipment carefully.
Verify:
- Heating type
- Cooling type
- Fan configuration
- Heat pump settings
- Auxiliary heating
- Emergency heating
If anything appears incorrect, update the settings before proceeding.
Step 6: Set Your Preferred Temperature
Configure your preferred:
- Heating temperature
- Cooling temperature
- Eco temperature
- Sleep temperature
- Away temperature
These preferences help Nest begin learning your daily routine.
Step 7: Enable Home and Away Assist
Home and Away Assist uses sensors and phone location to detect whether someone is home.
When everyone leaves, Nest automatically switches to energy saving temperatures.
When someone returns, comfort settings resume automatically.
Step 8: Create a Heating and Cooling Schedule
Although Nest eventually learns your routine, creating an initial schedule speeds up the learning process.
Example schedule:
Morning
Comfort temperature before waking.
Daytime
Energy saving mode while everyone is away.
Evening
Comfort temperature after work.
Night
Lower energy usage while sleeping.
Step 9: Test System Operation
After setup, test every operating mode.
Verify:
- Heating starts correctly
- Cooling activates normally
- Fan operates properly
- Temperature changes respond quickly
- Remote controls function correctly
Testing helps identify configuration issues before regular use.
Step 10: Monitor Performance
During the first week, observe:
- Temperature accuracy
- HVAC cycling
- Energy reports
- Schedule effectiveness
- WiFi stability
Minor adjustments during the first few days help Nest optimize performance.
Tools Required
Although software setup requires minimal equipment, having these items available makes the process easier.
- Smartphone or tablet
- Google Home app
- Stable WiFi connection
- Google account
- HVAC system information
- User manual
- Screwdriver (if adjustments are required)
- Internet connection
Professional installers may also use HVAC diagnostic tools to verify proper communication between the thermostat and your heating and cooling equipment.
Common Mistakes During Nest Thermostat Setup
Skipping WiFi Connection
Without WiFi, your thermostat cannot:
- Receive firmware updates
- Enable remote control
- Sync with Google Home
- Generate energy reports
Incorrect HVAC Configuration
Accepting incorrect equipment detection can cause:
- Poor heating
- Weak cooling
- Frequent cycling
- Reduced efficiency
Ignoring Software Updates
Many users skip firmware updates during setup.
Keeping the thermostat updated improves performance, compatibility, and security.
Poor Thermostat Location
A thermostat installed near:
- Windows
- Air vents
- Kitchens
- Direct sunlight
- Exterior doors
may produce inaccurate temperature readings.
Weak Internet Signal
An unstable WiFi connection may interrupt:
- Remote access
- Automation
- Notifications
- Energy reporting
Not Creating a Schedule
Waiting for Nest to learn without providing an initial schedule may delay energy savings during the first few weeks.
Professional Setup vs DIY Setup
| Professional Setup | DIY Setup |
|---|---|
| Complete HVAC configuration | Manual configuration |
| WiFi and Google Home integration | Self configuration |
| Heating and cooling verification | Limited testing |
| Smart feature optimization | Basic setup |
| Full system diagnostics | No advanced diagnostics |
| Faster setup | May require troubleshooting |
| Professional guidance | Self learning |
For homeowners with standard HVAC systems, DIY setup is often straightforward. However, professional setup is recommended for complex heating and cooling systems, multi zone configurations, heat pumps, or users unfamiliar with smart thermostat technology.
When Should You Hire a Professional for Nest Thermostat Setup?
While Google Nest thermostats are designed with user friendly installation and setup in mind, not every home has the same HVAC configuration. Some systems require advanced wiring, specialized settings, or compatibility adjustments that are best handled by an experienced technician.
Hiring a professional can help ensure your thermostat is configured correctly from the start and that every smart feature works as intended.
Your HVAC System Is Complex
Professional setup is recommended if your home includes:
- Multi stage heating or cooling systems
- Heat pumps
- Dual fuel HVAC systems
- Zoned heating and cooling
- Boiler systems
- Radiant floor heating
- Whole home ventilation systems
These systems often require additional configuration to ensure accurate operation.
You’re Replacing an Older Thermostat
Older thermostats may have outdated wiring, unlabeled terminals, or compatibility issues.
A professional installer can:
- Identify existing wiring
- Verify compatibility
- Install a C Wire if required
- Configure HVAC settings correctly
Your Thermostat Won’t Connect to WiFi
If your Nest thermostat repeatedly disconnects or fails to connect during setup, a technician can diagnose whether the issue is related to:
- Router configuration
- WiFi signal strength
- Software updates
- Network compatibility
Your HVAC System Isn’t Responding Properly
If heating or cooling doesn’t activate after setup, professional troubleshooting can quickly identify whether the issue involves:
- Wiring
- Equipment compatibility
- Incorrect configuration
- HVAC control board
- Thermostat settings
You Want Complete Smart Home Integration
Professional setup ensures seamless integration with:
- Google Home
- Smart speakers
- Smart displays
- Voice control
- Home automation routines
- Mobile devices
Advanced Tips for Optimizing Your Nest Thermostat
Once your thermostat is installed and configured, these best practices can help improve performance and maximize energy savings.
Enable Eco Mode
Eco Mode automatically adjusts temperatures when your home is unoccupied.
Benefits include:
- Lower energy consumption
- Reduced HVAC runtime
- Lower utility bills
- Longer equipment lifespan
Review Energy Reports
Nest provides detailed reports showing:
- Heating usage
- Cooling usage
- Temperature history
- Energy saving opportunities
Reviewing these reports regularly helps identify ways to improve efficiency.
Adjust Seasonal Settings
Your comfort preferences often change throughout the year.
Update:
- Heating schedules
- Cooling schedules
- Eco temperatures
- Away temperatures
to match seasonal weather conditions.
Keep Firmware Updated
Software updates improve:
- Device security
- Smart features
- HVAC compatibility
- Performance
- Reliability
Allow automatic updates whenever possible.
Optimize Thermostat Placement
If you’re installing a new Nest thermostat, choose a location that is:
- Away from direct sunlight
- Free from drafts
- Not directly above vents
- Away from kitchens
- Approximately five feet above the floor
Proper placement improves temperature accuracy.
Connect Additional Smart Devices
Nest works even better when connected with other smart home devices, allowing you to create automated routines that improve convenience and energy efficiency.
Frequently Asked Questions
How long does Nest thermostat setup take?
Most homeowners complete the software setup within 20 to 45 minutes after the thermostat has been physically installed. More advanced HVAC systems may require additional configuration.
Can I set up a Nest thermostat without WiFi?
Yes, basic heating and cooling functions will still work. However, features such as remote control, Google Home integration, software updates, and energy reports require a WiFi connection.
Do I need the Google Home app?
Yes. The Google Home app is required to manage your Nest thermostat remotely, create schedules, monitor energy usage, and integrate it with other smart home devices.
Why isn’t my Nest thermostat connecting to WiFi?
Common causes include:
- Weak wireless signal
- Incorrect WiFi password
- Unsupported network settings
- Outdated firmware
- Router configuration issues
Restarting both the thermostat and your router often resolves the issue.
Why is my Nest thermostat not heating or cooling properly?
Possible reasons include:
- Incorrect wiring
- HVAC compatibility problems
- Incorrect system configuration
- Power supply issues
- Faulty HVAC equipment
Professional troubleshooting may be required if the issue persists.
Does Nest thermostat learn my schedule automatically?
Yes. Nest uses machine learning to observe your daily temperature adjustments and gradually creates an automated schedule that reflects your routine.
Can I control multiple Nest thermostats?
Yes. The Google Home app allows you to manage multiple Nest thermostats across different rooms or properties from a single account.
Is professional Nest thermostat setup worth it?
For homes with complex HVAC systems or homeowners unfamiliar with thermostat wiring and configuration, professional setup can prevent costly mistakes, improve performance, and ensure every smart feature functions correctly.
Conclusion
Completing your Nest thermostat setup correctly is essential for getting the most out of your smart home investment. Beyond simply connecting the device, proper configuration ensures accurate temperature control, reliable HVAC operation, smart scheduling, remote access, and long term energy savings.
Whether you’re setting up a newly installed thermostat or reconfiguring an existing device, taking the time to optimize every setting will improve comfort and help your heating and cooling system operate more efficiently.
For homeowners with advanced HVAC systems or compatibility concerns, professional assistance can provide added confidence and ensure your Nest thermostat performs exactly as designed.